Helm
As we see from the previous section, even for a very basic application, we begin to need many manifest files. For a large enterprise application this can grow enormously in which it becomes cumbersome to kubectl create (or delete) so many files. Similarly, we may need to create many of the same application but with different configurations. This is where Helm comes in.
What is Helm
Helm is a package manager for Kubernetes applications. You can group together multiple Kubernetes manifests into one folder, and have a single Helm definition file describe the chart (packages in Helm are called charts). Also, Helm uses Go's templating engine to make the underlying Kubernetes manifests more dynamic where you can use variables.
This can also be handy to separate chart maintainer from chart user. E.g. The chart maintainer can package up a bunch of k8s manifests that make up an application as a helm chart and only expose a few key parameters as variables. So the user won't have to dig through the manifests to change things, instead can just change the exposed parameter. This will make sense shortly when we create our own chart.
Installation
First let's install Helm. It's best to follow their guide for your particular operating system: here.
We can test if the installation worked by checking the Helm version that was (hopefully) installed.
helm version
helm repo
Helm uses the concept of a repository as somewhere which charts are stored. A very popular chart repository is managed by Bitnami. We can add their repository address to Helm using the command:
helm repo add bitnami https://charts.bitnami.com/bitnami
We now have access to a ton of pre-build charts of popular open-source applications packaged up as Helm charts, ready to be installed in our Kubernetes cluster. All of their charts can be seen here.
helm install
The command helm install will, as the name suggests, install an application into our cluster from a specified Helm chart. We'll stick with our basic Nginx example. Luckily, Bitnami manages an Nginx chart ready to install. The command below tells helm to install a chart, name it my-nginx and get it from the bitnami repo, and from that repo, use the chart named nginx.
helm install my-nginx bitnami/nginx -n nginx --create-namespace
We're also using the flag -n (short for namespace, --namespace would also work) to tell Helm to install it in the nginx namespace. Now, this would error because we haven't created a namespace called nginx, so we also use the flag --create-namespace to tell Helm that if the namespace we specified doesn't exist then to create it first.
We can list all charts that have been installed in the nginx namespace with the following command:
helm list -n nginx
Hopefully we should see something like this:
NAME            NAMESPACE       REVISION        UPDATED                                 STATUS          CHART           APP VERSION
my-nginx        nginx           1               2023-05-11 21:19:31.764271744 +0100 BST deployed        nginx-14.0.0    1.24.0
We can also use kubectl to see all the objects created using the following command:
kubectl get all -n nginx
Giving something like:
NAME                            READY   STATUS    RESTARTS   AGE
pod/my-nginx-74b4885cbf-86dvt   1/1     Running   0          13s

NAME               TYPE           CLUSTER-IP     EXTERNAL-IP   PORT(S)        AGE
service/my-nginx   LoadBalancer   10.96.79.211   <pending>     80:30874/TCP   13s

NAME                       READY   UP-TO-DATE   AVAILABLE   AGE
deployment.apps/my-nginx   1/1     1            1           13s

NAME                                  DESIRED   CURRENT   READY   AGE
replicaset.apps/my-nginx-74b4885cbf   1         1         1       13s
We can see the chart created a service of type LoadBalancer. But what if we would prefer type ClusterIP instead?
Values File
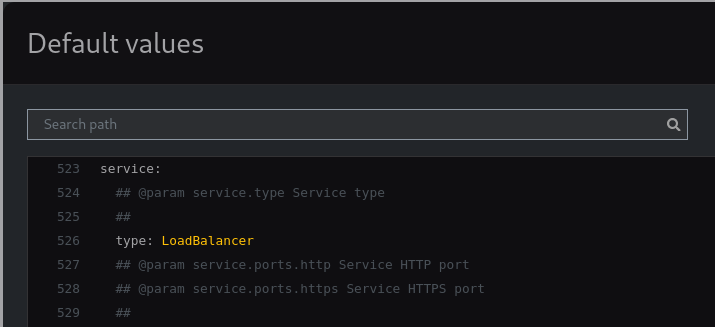
Helm uses a values file which overwrites the 'templated' values in the manifests (we'll see this in greater detail when we create out own Helm chart). Each chart comes with default values used for these templated variables, and if you don't do anything, they will be used. We can see the default values here. There are a lot of lines in that link. These types of publicly available charts are very comprehensive to be maximally flexible for users. Though, the above link should take you to the exact section we're interested in. We can see that the default value for service.type is LoadBalancer.
Now the beauty of Helm is that we can chose to overwrite only what we want. So we can create a file called values.yaml and just add the two lines below:
service:
  type: ClusterIP
And when using this with Helm, it will overwrite those specifically, and use the default values for everything else.
We can use the helm upgrade command to upgrade an already installed application using the form helm upgrade <release-name> <repo-name>/<chart-name> --values <path-to-values-file>:
helm upgrade my-nginx bitnami/nginx --values values.yaml -n nginx
We could have used the following command if we hadn't already installed this chart with name my-nginx:
helm install my-nginx bitnami/nginx --values values.yaml -n nginx --create-namespace
install is used for creating a new application. upgrade is for updating an already installed application.
Now if we use the following command:
kubectl get service -n nginx
We should hopefully get something like:
NAME       TYPE        CLUSTER-IP     EXTERNAL-IP   PORT(S)   AGE
my-nginx   ClusterIP   10.96.79.211   <none>        80/TCP    38m
Great, our service has been updated to be of type ClusterIP, and this was done with a Helm values file; we didn't have to dig through the underlying kubernetes object definition manifest files that make up the application.
helm uninstall
Before we learn how to create our own Helm chart we can clean up our previous installation with the following command:
helm uninstall my-nginx -n nginx
Creating our own chart
Now let's have a look at how we can create our own Helm chart of the same application we made in the previous tutorial.
helm create
The helm create command is a handy way to create a chart directory along with the common files and directories used in a chart. We can name the new chart my-app:
helm create my-app
This should create a folder and files as below:
.
└── my-app
    ├── .helmignore
    ├── charts
    ├── Chart.yaml
    ├── templates
    │   ├── deployment.yaml
    │   ├── _helpers.tpl
    │   ├── hpa.yaml
    │   ├── ingress.yaml
    │   ├── NOTES.txt
    │   ├── serviceaccount.yaml
    │   ├── service.yaml
    │   └── tests
    │       └── test-connection.yaml
    └── values.yaml
- .helmignore: Tells Helm which files and folders to ignore when packaging a chart.
- charts/: This contains and sub-chart dependencies. We won't worry about this now.
- Chart.yaml: This is the main definition file for Helm charts. Contains chart name, version number etc.
- templates/: Contains all the Kubernetes manifests that make up the chart.
- templates/tests/: Contains tests
- values.yaml: The default values for the manifest templates.
Tidy up the folder
We won't need all the files, so let's clean up the folder a bit. We won't need the charts/ folder, but it's empty anyway, so we can leave it as it is. Delete everything in the templates/ folder so we have a clean slate to put our own k8s manifests in. Delete the values.yaml file so we can make our own one (alternatively you can just delete everything inside the file).
The folder structure should look like this:
.
└── my-app
    ├── .helmignore
    ├── charts
    ├── Chart.yaml
    └── templates
Okay, now let's add our files. To match the application from the previous tutorial, we will need a deployment.yaml, service.yaml and an ingress.yaml. Put those in the templates/ folder. Also create a values.yaml file and put it in the chart's root directory.
The folder structure should now look like this:
.
└── my-app
    ├── .helmignore
    ├── charts
    ├── Chart.yaml
    ├── templates
    │   ├── deployment.yaml
    │   ├── service.yaml
    │   └── ingress.yaml
    └── values.yaml
We didn't make a namespace.yaml file as we can just tell Helm which namespace to install our application into.
We didn't change the Chart.yaml file as helm create gives us sensible defaults. If you want to change this you can read up on it more.
Templating and Built-in objects
Helm uses Go's templating engine to add custom logic, functions and variables into the YAML template files.
There's plenty to read up on how Helm uses templating, and we recommend you do so. But the basic syntax is to put code between double curly braces: {{ }}.
Functions
There are built-in functions, such as and, or, default etc. We won't use any of these just yet but are useful to learn.
Control flow
There is control flow, such as if/else for creating conditional blocks. This looks like:
{{ if <boolean-expression> }}
some yaml
{{ end }}
Built-in objects
And most importantly, there are built-in objects which can be accessed from within a template. The most common one is the Values object, which contains values from the values.yaml file. This is what gives Helm such flexibility. To access these values, we use the double curly brace syntax {{ .Values.some.default.value }}
The Release object is also useful, and contains information about the release. A release is what Helm calls an installation of a chart. So you can you access Release.Name for example which contains what you named the install. For example, using command helm install my-app bitnami/nginx, Release.Name would be my-app.
Note the . at the beginning when using {{ .Values }} and {{ .Release }}. This can be a little confusing, but essentially Helm creates a top-level root object that contains all the other built-in objects. So we first access the top level object with a . and the use the variable names inside it.
Let's fill in the templates.
Deployment
This deployment is exactly the same as the previous tutorial, except the highlighted parts with new templated variables.
First we use the release name to name the deployment. So if we use helm install my-app <chart-name>, then the deployment name would be my-app-deployment.
Next, we'll use the Values object to access how many replicas, the image name and the image tag. We'll see how this looks in the values.yaml file below.
apiVersion: apps/v1
kind: Deployment
metadata:
  name: {{ .Release.Name }}-deployment
spec:
  replicas: {{ .Values.replicas }} # prettier ignore
  selector:
    matchLabels:
      app: my-app
  template:
    metadata:
      labels:
        app: my-app
    spec:
      containers:
        - name: my-container
          image: "{{ .Values.image.name }}:{{ .Values.image.tag }}"
          ports:
            - containerPort: 8501
Service
Very similar to the deployment above, the service will get its name from the Helm release name, and we've also decided to make what type of service to use to be variable.
apiVersion: v1
kind: Service
metadata:
  name: {{ .Release.Name }}-service
spec:
  selector:
    app: my-app
  type: "{{ .Values.service.type }}"
  ports:
    - protocol: TCP
      port: 8080
      targetPort: 8501
Ingress
Also similar to deployment and service above, the ingress will get its name from the release, and the URL path to use can also be decided by the chart user in the values file.
We've also encapsulated the entire template in an if statement, which checks the boolean expressions it's given to determine whether to include the enclosed yaml code. We will see Values.ingress.enabled is a boolean value (default true), so this is a nice way to make adding Kubernetes objects optional.
{{ if .Values.ingress.enabled }}
apiVersion: networking.k8s.io/v1
kind: Ingress
metadata:
  name: {{ .Release.Name }}-ingress
  annotations:
    nginx.ingress.kubernetes.io/rewrite-target: /$1
spec:
  rules:
    - http:
        paths:
          - path: /{{ .Values.ingress.urlPath }}/(.*)
            pathType: Prefix
            backend:
              service:
                name: {{ .Release.Name }}-service
                port:
                  number: 8080
{{ end }}
Default values
Finally, let's create the default values file that will populate the Values object for use in the templates:
replicas: 3

image:
  name: justingodden/mystreamlitapp
  tag: 0.1.0

service:
  type: ClusterIP

ingress:
  enabled: true
  urlPath: my-app
Remember that the values.yaml file goes into the root directory of the chart, not in the templates folder.
Install the chart
Let's install our chart. Assume you followed the instructions above and used helm create my-app, you current working directory contains the folder my-app. If you are inside the my-app folder, use cd .. to move up one level. This will be useful shortly.
Remember the install command is helm install <release-name> <chart-location> [COMMANDS]. <chart-location> can be a repo URL that is hosted online. For us, this is just the my-app folder path.
So we can give the release a name of my-release and use the command:
helm install my-release my-app
If our current working directory was inside the my-app chart folder, then the command would be helm install my-release ..
Note we didn't include and namespace information, so the app is installed into the default namespace.
If all done correctly, we should be able to see the app by going to http://localhost/my-app/.
Update the chart
Great, now let's see how easy it is to update the variables that we added to the templates.
There are 3 main ways do this this:
Change the default values file
We can simply change the values in the values.yaml file in the chart and use helm upgrade my-release my-app to see it take effect.
This is not recommended unless you truly want to update the default values. Default values are there for a reason as sensible defaults put there by the chart developer. It's for the chart user to add their own values on top of the default ones (like we did in the previous example)
You can think of this like a Python function. We have a sensible default (param = True) in the function definition, but can be overridden when calling the function. But we wouldn't change the function definition unless we thought those were more sensible permanent defaults:
def func(param: bool = True) -> None:
  pass

func(param=False)
Use our own (non-default) values file
A better way is to use another values file to override the default values. Even though we have the chart in our working directory, you can imagine the chart being in an online repo, which has its default values, and we use our own file to override some values like we did in the Bitnami Nginx example.
Maybe we want to change what the URL path that we use to access the app. So we can create a file and call it my-values.yaml and override ingress.urlPath to use the value streamlit instead:
ingress:
  urlPath: streamlit
The folder structure should look like:
.
├── my-values.yaml
└── my-app
    ├── templates
    ...
    └── values.yaml
Now we can use the command below to update the release to use our values on top of the default ones:
helm upgrade my-release my-app --values my-values.yaml
Now, the previous URL should return a 404 Not Found error, and the app should be be found at http://localhost/streamlit/.
Use --set flag
The final way we can override the default default values is using the --set flag. This also isn't recommended as there's no audit trail of what went into a release. I.e. no values file to see what definition the release was made from.
Nonetheless, we can show it in action here by updating the number of replicas:
helm upgrade my-release my-app --reuse-values --set replicas=2
We can check it work with:
kubectl get deployments
Which should show that the deployment now has 2 pods:
NAME                    READY   UP-TO-DATE   AVAILABLE   AGE
my-release-deployment   2/2     2            2           34m
Note we used the flag --reuse-values. This tells Helm to keep all current values and just change the ones that we're now setting.
If we were to just use helm upgrade my-release my-app --set replicas=2 without --reuse-values, this would reapply all the default values from the my-app chart, and only override what we added with --set (I.e. not using our values from my-values.yaml).
To do it this way and include our my-values again, we'd need to do:
helm upgrade my-release my-app --values my-values.yaml --set replicas=2
But it's just easier to use --reuse-values.
Clean up
We can uninstall the Helm release, thus removing all the Kubernetes objects it created with the command below:
helm uninstall my-release