Docker - Custom Containers
Hopefully you created a free Dockerhub account during the last lesson, as we'll be creating and uploading our own images to store in a Dockerhub repo.
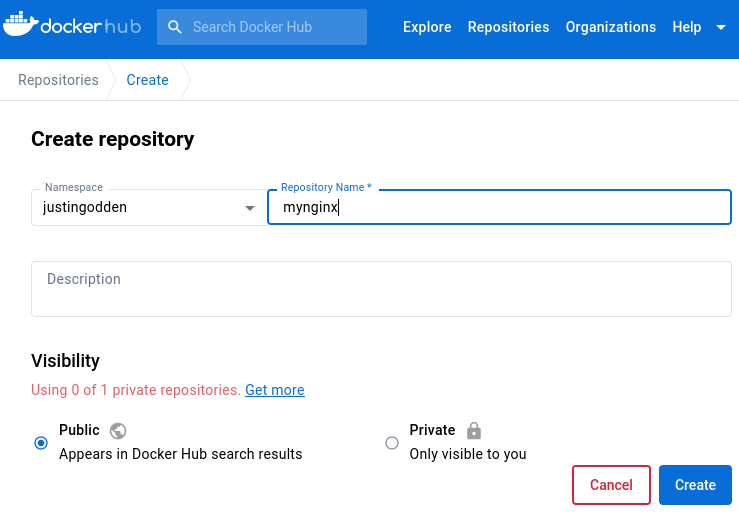
Once you've done that and are signed in, create a new public repository named 'mynginx' like below:
Dockerfile
The Dockerfile is the specification of your image. They contain a series of commands that tell Docker what to put into your container image.
The details aren't too important, but Docker has a clever layering system for images, where each of the files that make up a Docker image is a layer, and these layers form a series of intermediate images built on top of each other. This allows Docker to cache layers, and only rebuild the sections of the software that has changed between builds, rather than rebuilding the entire image, speeding up build time.
Almost all images inherit from a base image from Dockerhub using the FROM command and build layers on top. A very popular base image is ubuntu (of course as we learned in the last lesson is an alias for docker.io/library/ubuntu:latest). This provides a great Linux environment to further build on top of.
The python image is another popular base image (that we will use later). But checking its Dockerfile on GitHub we can see that it inherits from the buildpack-deps:bullseye image, which itself inherits from its own image but with a different tag: buildpack-deps:bullseye-scm, which does the same with another of its tags: buildpack-deps:bullseye-curl, which inherits from the debian:bullseye image. Finally, we can see debian inherits from scratch, which is used for building base images.
FROM scratch is considered a no-op in a Dockerfile and won't create an extra layer. Fascinating!
First Dockerfile
Let's create our first Dockerfile. Wee'll keep it nice and simple to learn the main commands with the Docker CLI. Create a file named 'Dockerfile' in your working directory and copy the code below into it.
FROM nginx
RUN echo '<h1>MLOps Made Easy!!</h1>' > /usr/share/nginx/html/index.html
We're using the FROM command to inherit from a base nginx image. This is the same image we've used before. We know it exposes a web application on it's container port 80. We've then added our own layer with the RUN command, and told it to execute an echo command and pipe its output to an .html file (this is the default location that Nginx serves static html files from).
Docker build
docker build is the command to build images. -t flag tells what to tag the image as. This is in the form <registry-address>/<namespace>/<image-name>:<image-tag>, but as mentioned before, we can omit the registry address and tag, and Docker assumes docker.io and latest, respectively. Lastly we specify the location of the Dockerfile. We have put . to mean in the current directory.
docker build -t <DOCKERHUB_USERNAME>/mynginx .
Of course replace <DOCKERHUB_USERNAME> with your actual username!
Docker push
Now that we've build the container, we can push it to Dockerhub with the following command:
docker push <DOCKERHUB_USERNAME>/mynginx
Docker run
Finally, we can check if it worked by issuing the command below; running the container in the background with -d and binding our computer's port 8080 with the nginx port 80 inside the container.
docker run -d --name nginxcontainer -p 8080:80 <DOCKERHUB_USERNAME>/mynginx
We can see if it worked by clicking http://localhost:8080.

Great!
Bigger, Better.
In the spirit of our ethos to go beyond the Hello, World! examples, let's do a more complicated project.
We'll make a better looking web application and learn some more Dockerfile commands along the way.
The purpose of this tutorial is not to learn Python, I assume some pre-requisite skills, so we won't go into too much detail for the following script.
The app
We're using Streamlit, which is a great tool for Python devs to quickly make a nice looking GUI without knowing web development. We're also using the Video Game Sales dataset on Kaggle.
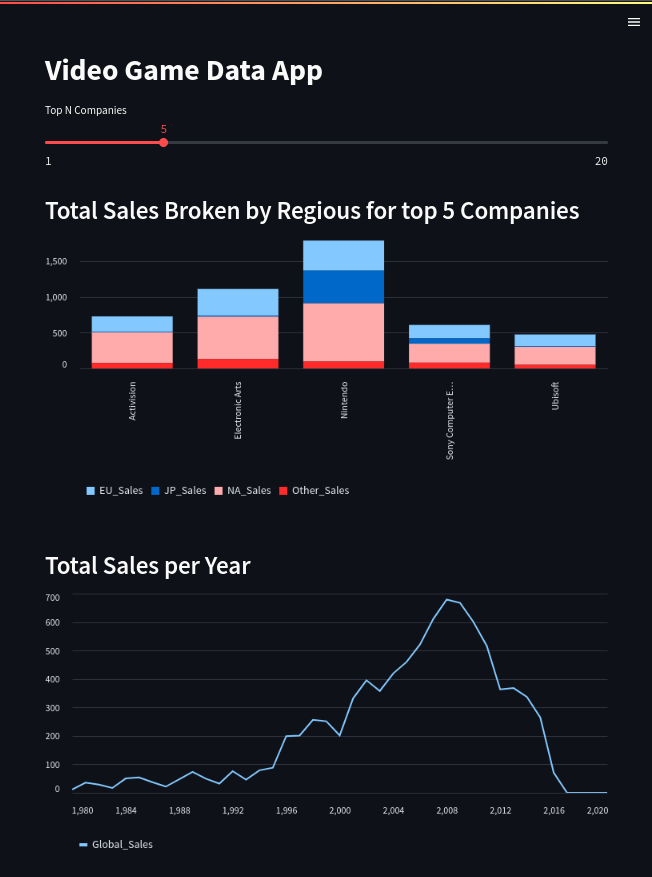
We've created a nice stacked bar chart that shows us total sales per company, broken up by region, with a nice interactive slider to select how many of the top companies you want to view on the chart.
We've also made a nice line chart of total global sales per year.
Copy the code below into a file called app.py in your working directory.
import streamlit as st
import pandas as pd

url = ("https://raw.githubusercontent.com/justingodden/mlops-made-easy-project-code/master/01-containers/streamlit-project/vgsales.csv")

@st.cache_data
def load_data(url):
    dataset = pd.read_csv(url)
    return dataset

data = load_data(url)

st.title("Video Game Data App")

n = st.slider("Top N Companies", 1, 20, 5)
st.header(f"Total Sales Broken by Region for top {n} Companies")
st.bar_chart(
    data.groupby("Publisher")[
        ["NA_Sales", "EU_Sales", "JP_Sales", "Other_Sales", "Global_Sales"]
    ]
    .sum()
    .sort_values(ascending=False, by="Global_Sales")
    .drop("Global_Sales", axis=1)
    .head(n)
)

st.header("Total Sales per Year")
st.line_chart(data.groupby("Year")["Global_Sales"].sum())
Dependencies
We also need a requirements.txt file in the working directory.
streamlit
pandas
Dockerfile
Lastly, create a file in your working directory named Dockerfile with the code below pasted in.
FROM python:3.10-slim-buster

USER root

WORKDIR /app/

COPY . .

RUN python -m venv venv

RUN . venv/bin/activate

RUN pip install --upgrade pip

RUN pip install --no-cache-dir -r requirements.txt

EXPOSE 8501

USER 1001

ENTRYPOINT ["streamlit"]

CMD ["run", "app.py"]
Now, we've just seen a few new commands.
We know the FROM command, but this time we've used a python image. More specifically one with the 3.10-slim-buster tag. This means it's packaged with Python version 3.10 and is based on the debian:slim-buster image, which is a very small Linux distribution with only the essential packages installed so it has a smaller footprint and a quicker load up time.
The USER command specifies which Linux user to run the commands as. root user is needed to interact with pip. A Dockerfile's default user is whatever is specified in the image it inherits from. Specifying it here isn't strictly necessary, as I believe the python image runs as root, otherwise it wouldn't be able to use pip. Either way, it's nice to be explicit.
WORKDIR both creates a directory, and then moved into it, making it the working directory.
COPY <from> <to> copies files from the host machine (your computer) into the container image. We've used . for both, meaning from whatever folder you're currently in right now on your computer, to the /app/ directory in the container image. This will copy the app.py and requirements.txt files over.
We've seen RUN before. We create a virtual environment, activate it, upgrade pip and install streamlit and pandas.
streamlit runs its web application on port 8501. The EXPOSE command informs Docker that the container listens on the specified network ports at runtime. However, the EXPOSE command does not actually publish the port. It functions as a type of documentation between the person who builds the image and the person who runs the container, about which ports are intended to be published. To actually publish the port when running the container, we use the -p flag on docker run.
As per best practices, we don't run the container with root privileges, we only used that to install some packages. Now we use the USER command to change to uid 1001 with only enough permissions to run the app.
ENTRYPOINT and CMD are very similar. In fact, they're also similar to RUN. They all issue commands, but do it in different ways and are used for different reasons. RUN executes commands in shell form where the command is run in a shell (such as /bin/sh/) which executes the command (just like we would in a terminal). This is useful for installing packages for example. It looks like pip install etc etc.
Whereas ENTRYPOINT and CMD are in exec form which looks like ["pip", "install", "etc", "etc"]. These are not run through a shell, they are run through the specified binary directly. ENTRYPOINT is run first, then CMD is appended onto it. ENTRYPOINT in not overridable, but CMD can be overridden when creating a container from the image. This allows a baseline behaviour with ENTRYPOINT but with flexible configurations with CMD. An example might be that you have a application that runs a webserver from the command webserver, and it takes in as command-line arguments the location of the .html file to serve and the port to expose. So you write your Dockerfile as:
...
ENTRYPOINT ["webserver"]
CMD ["--location", "/html/index.html", "--port", "8888"]
This provides default values if the user doesn't want to change anything, but if they do, we can do as follows:
docker run example-image --location /other/file.html --port 9999
Dockerhub repo
Before we forget, make another public repository on your Dockerhub account called 'mystreamlitapp'.
Build, push, run
Okay, let's give it a go. Same as before (remember to replace <DOCKERHUB_USERNAME> with your Dockerhub username).
docker build -t <DOCKERHUB_USERNAME>/mystreamlitapp:0.1.0 .
docker push <DOCKERHUB_USERNAME>/mystreamlitapp:0.1.0
docker run -d --name streamlitapp -p 8081:8501 <DOCKERHUB_USERNAME>/mystreamlitapp:0.1.0
Result
If all goes to plan, we can open http://localhost:8081 and see a beautiful interactive dashboard!
Cleanup
Excellent work. Let's just clear up the mess we made and shut down the running containers!
docker kill
First we can use the two kill commands below to stop both running containers.
docker kill nginxcontainer
docker kill streamlitapp
docker rm
The we can use rm to remove the stopped container from our computer.
docker rm nginxcontainer
docker rm streamlitapp
docker rmi
Optionally, we can also delete the docker image with rmi if we wish to save some hard disk space.
docker rmi <DOCKERHUB_USERNAME>/mynginx
docker rmi <DOCKERHUB_USERNAME>/mystreamlitapp:0.1.0
Using docker rmi <username>/<image> does not delete the image from Dockerhub, only from where it's stored locally on your computer.